Connecting to the Frontline Printer
Introduction:
To connect to the Frontline printer, regardless of your operating system, you will need to download the driver from Konica to ensure you are able to utilize all the features of the printer, including stapling, and hole punching.
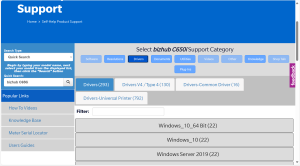
Step 1 - Download the Driver
https://onyxweb.mykonicaminolta.com/onestopproductsupport?appMode=public&productId=2275
(If this URL doesn't work, search "Konica Minolta Drivers Onyx" from google and click on the link from "onyxweb" Go to the above link and search c651i and click on drivers. From the drop-down menu select your operating system.

Step 2 - Install the Driver
Unzip the downloaded file and open the folder.
Mac: Click into the "Letter" folder and select the .pkg file. Follow all the prompts to complete the setup.
Windows: Click on the Setup.exe
Step 3 - Add the Printer to your Device
Mac:
- Open system settings and search "printers"
- Click on "printers and scanners"
- Press plus icon beneath the printer list (or the button that says "add printer, scanner, or fax") C
- Select the globe icon labeled "IP" at the top of the window
- Enter the IP address: 10.0.0.38
- Choose the protocol "AirPrint"
- You may change the name of the printer to whatever you like
- Ensure the device dropdown has changed to BizHub 650i, or select it from the dropdown menu. Click save.
Windows:
- Search Printers and Scaners in the settings
- Click Add Device
- Select Konica Minolta c651i from the options and select add device
- If needed: select add manually
- Choose the checkbox Add a printer using IP Address
- Change Device type to "TCP/IP Device"
- Enter 10.0.0.38 as the IP address
- Press next until you can change the name to whatever you like
